Showing posts with label Recipes. Show all posts

Tuesday, February 10, 2015

Dips and Dustings

For Dolly's birthday dinner, she asked for a Calamari appetizer. I was pretty happy with how it turned out, so before I lose the scraps of paper I made my notes on, I thought I'd write it all down here where I can find it a lot easier later.
And while I'm in a recording mode, let it be noted that Dolly made dinner by herself (mostly) Monday night. Tuna Casserole (she followed a recipe out of her new cookbook) and perfectly cooked green beans. She'll never understand what a treasure to me that milestone was, but it's one I'll savor for a long time.

Deep Fry Calamari Appetizer
Serves 8
  • 680 g. calamari pieces
  • 1 red pepper
  • ½large onion
  • 1&12;c. flour
  • &34;tsp. ground black pepper
  • &3tsp. salt
  • 2tsp. paprika
  • vegetable oil for frying
Thaw (if frozen) and drain calamari. Slice pepper into ¼" strips. Thinly slice onion across the grain to make ¼" or smaller half-ring strips. In a separate bowl, mix flour, salt, pepper and paprika. Heat oil to 375° in a large skillet. In turns, dust and fry calamari, peppers and onions for 2-5 min until golden. Drain and keep in a low temp oven until ready to serve. Layer peppers and onions throughout calamari on a platter and serve with a dip of your choice.


Chipotle Dip
Makes about 2 cups.
  • 2 Tbs. pureed Chipotle peppers in Adobo sauce
  • ¾c. mayonnaise
  • ½c. plain yogurt
  • ½c. sour cream
  • 1 tsp. Liquid Smoke
Mix all ingredients together and serve! Super easy, and delicious!

Monday, December 09, 2013

Fiesta Feast

Actually, it was just dinner tonight. However, if you have a small army to feed, it does feel like you're preparing a feast whenever it comes time to 'start on dinner'. I love that this meal is so simple. The hardest part was dicing the meat up, which could be done ahead of time if you're not like me and actually think of practical things like that. Anyway, I need to have this somewhere that I can find it in a hurry, which means it gets posted here. Enjoy!

Pork & Hominy Stew
Serves 12-16
  • 4 lbs Pork (½" cubes)
  • 4 cups canned Hominy
  • 2 Onions (diced)
  • 2 Tbs Cumin
  • 1 Tbs Salt
  • ½tsp Pepper (ground, black)
  • 1 Tbs minced Garlic
  • 1 bunch Cilantro (finely chopped)
  • 3 cups shredded Cabbage
  • 8 cups Water
Cook pork with cumin and pepper in a saucepan with about a tablespoon of oil on medium-hi until meat is evenly browned. Add salt and dump into a large stock pot with the hominy and water and bring to a boil. Cover and simmer for one hour. While your pot is coming to a boil, saute the onions and garlic and add them to your stew. Chop cilantro and cabbage and set aside. When your stew has simmered for an hour, remove from heat, stir in cilantro and cabbage and serve with garnishes of sour cream, salsa and corn chips!

Thursday, November 22, 2012

Making Yogurt

There's not much in the way of an ingredient list or cooking times when it comes to making yogurt this way, but I still need some sort of reference post to go to when I forget the numbers or ranges involved in the process. Here's my yogurt tale.

My kids love yogurt, and before I realized we could make it at home, it was only a once in a long time treat. Those little 1 qt tubs for $3 that are gone in one meal after everyone got one serving each, just weren't all that affordable. And besides... they were always runny. Sloupy. Not to mention, the flavored ones were more like candy (with all the sugar and food coloring you have no control over) and the flavor options were limited.

One evening when were were at Chasm's house way back in May, Chasm's Lady offered me some yogurt that she'd made. It was plain yogurt - I usually avoided plain yogurt because it always seemed bitter to me. But I tried her yogurt, and it was good! Really good, even though it was plain. I could perfectly picture sweetening it just a tiny bit with honey and having an absolutely delicious desert. I asked about how she'd made it and got a few vague approximate values. She'd followed some advice/recipe online using a crockpot, but it wasn't a picky process, so she didn't have exact information for me, but she did send me home with a small tub of it.

So, I looked online and found as many recipes/instruction methods using a crock pot as I could, and compared the likenesses and differences and tried it myself. My first try turned out perfectly, and that was the end of store-bought yogurt for us.

Anyway, as long as I made a batch of yogurt every week, the information was fresh enough in my mind that I didn't have to go looking up details, but toward the end of September we went on a trip and when we got home the last of the leftover yogurt in the fridge had spoiled which meant I didn't have a starter to work with. By the time I got around to finding some, I couldn't remember all the particulars in my process. So I had to start over finding all the online information to compare and after that I decided to write down my own version for reference. Finally I got around to taking some pictures during the process to go with my post.

Crock Pot Yogurt


The tools and ingredients.

  • Milk - Any kind is supposed to work, but the closer to whole milk makes for the best results. So far I've only tried whole milk, so I don't know what kind of changes would need to be made for other types yet.
  • Yogurt with live/active cultures for a starter. I've only used plain yogurt for a starter. I don't know if you can use a flavored yogurt or how it would turn out if you did. The ratio of yogurt to milk is 1 cup to a gallon.
  • A Thermometer. It has to be able to register as low as 110° and as high as 180° F. I have a digital meat thermometer and a dial candy thermometer, and I still can't decide which I like best.
  • A Crock Pot. It just needs to have a 'low' setting and must be big enough to hold the amount of milk you're turning into yogurt.
  • Thick bath towel. For extra insulation.
  • Small mixing bowl, Whisk, Stirring spoon & Mesh colander or fine seive.

    The Directions: (more or less)

    1. The first step is just putting the milk in the crock pot, making sure the lid in on and setting it to 'low'. I stir and check the temperature every hour or so and usually coming straight from the fridge, it takes my crock pot approximately 3 or 4 hours to reach 180° which is what you need it to reach before going on to the next step.

    2. Once the milk has reached 180°, turn the crock pot off, stir the milk, and leave the lid off. Now the milk has to cool to 110° so that you can add the starter. Again, I stir and check the temperature every so often. This is when you take the 'starter' yogurt out of the fridge to start coming to room temperature. If it's too cold, it will cool the milk down too much and the yogurt turns out sloupy. Hm, I think I like that word.


    3. When the milk has cooled down to the 110°-115° range (for me this takes another hour or two depending on how often I stir it), scoop out twice the amount of starter you will use into the mixing bowl and add the starter to it. For example, if you're making a gallon of yogurt, you'll be using a cup of starter, so you're going to take out 2 cups of warm milk to mix the starter into.


    4. This step is probably still part of the last one, but I'm going to separate it, to emphasize my point. Make sure to mix the 'starter' and warm milk well. Then once you add it back into the crock pot of milk, make sure to mix it well there too. But once it's mixed into the warm milk, DO NOT MIX IT ANY MORE. This is when the yogurt cultures need to 'incubate' and do their work. Stirring it disturbs the process and alters the final outcome. You want to do this step quickly, because the more you stir, and the longer you take, the faster you'll lose your target temperature of 110°.


    5. As soon as your starter mix is stirred into the crock pot, put the lid back on, check your temperature and then completely wrap the crock pot (which is still OFF at this point) with the bath towel. The idea here is to try to keep the temperature at 110° for 7 to 8 HOURS. I check the temperature every couple of hours (unless it's sitting overnight).

    If the temperature drops too quickly, I'll turn the crock pot back on for 10 minutes, but REMEMBER TO TURN IT OFF AGAIN!!! I completely cooked my last batch of yogurt because we got sidetracked doing a puzzle before the kids had to go to bed and by the time I remembered my yogurt it was back up to 165°. Anything over 120° will kill the yogurt culture and I haven't figured out what to do with a ruined gallon of milk/yogurt stuff. It has to be usable some how, but it'll need some experimentation.

    After 8 hours, the yogurt starter/culture will have done it's trick, and you'll be almost done. This is when you can stir it up, and stick the whole batch in the refrigerator to stop the process completely. The longer you leave the yogurt un-stirred and not chilled, the tangier the plain yogurt will be. So the amount of disturbance you choose, is up to you. I usually just give it a quick stir, and put it in the fridge for a few hours at least because there's one more step I like to go through to avoid sloupiness.


    6. Finally, I drain the yogurt. Some people put the whole batch in a cheesecloth and let it drain from 2 or 3 hours to overnight, but I like to drain it in smaller amounts. One reason is that I don't usually have cheesecloth floating around, and the other reason, is that I need to get my giant crock pot out of the refrigerator since it takes up way more space than is really practical. Plastic containers with flat lids stack so much nicer than a 5 qt crock pot with a dome lid on it. I fill my little strainer and place it over a container on the counter to catch the whey. After 45 min to an hour, I dump the drained yogurt into an empty container, put it in the fridge and then repeat the process until the whole batch is drained. If I use more than one strainer, the time to drain the whole batch is even less. I make sure to stir each strainer-worth into the rest of the drained yogurt when I add it, and the result is a thick, creamy, delicious yogurt.

    You can eat it plain, or add almost anything to it. We've tried mint jelly, orange marmalade, cinnamon, vanilla, chopped peaches and blueberries among a handful of other ideas. It's the breakfast AND snack of choice around here - especially with a spoonful of homemade strawberry jam or a swirl or two of honey stirred in. The only drawback is that a batch never lasts more than a week even when I ration it out. Apparantly, you can store it in the refrigerator for 2-3 weeks, but I haven't had a chance to test that since ours is always gone long before that estimate.

    Just make sure to take enough out to save for your next batch's starter. Also, the starter yogurt can be frozen! This is especially nice if you're not going to get to making another batch right away. Or when you accidently let someone eat the last of the yogurt before you remembered to take some out for a starter. Or when you cook your yogurt to death like my last batch.


  • Saturday, November 10, 2012

    Savors of Summertime


    The Ingredients

    Here's my most recent, past, draft post. Sometimes there's nothing quite like a current post either. :) Oh well, if I don't dig through my drafts once in a while, I won't be able to appreciate the more timely-posted posts. Besides, I want to have this recipe where I can find it easily, so old or not, it's going up now.

    July 14th...

    There's nothing like fresh salsa. And there's nothing to describe how a mama feels when her little people fall in love with it!
    Yesterday I made a batch of salsa thinking that we'd have a little last night, and I'd take the rest with us for lunch on Sunday. But I felt like having some for a snack/lunch today and served up a cereal bowl full. Then PC walked by. "What's that?" he asked (probably because he was hungry as a result of me not serving lunch yet) "It's salsa, but you might not like it... 'cause it might be spicy." I told him. He wanted to try it, and was hooked. He needed his own bowl. It wasn't long before Butler wandered in. I offered him some, but added a dab of sour cream. He was sold too. Before I knew it, both boys were feeding salsa by the chipful to Ricka. She wanted nothing to do with the chips....

    Grandpa Dan's Salsa Makes 1 gallon!
    • 1qt canned Tomato Juice
    • 5 Anaheim peppers
    • 7 - 10 Roma tomatoes (any kind will work though)
    • 2 Onions
    • 2 Green Bell peppers
    • 1 bunch Cilantro
    • 1-2 Jalapeno peppers (minced)
    • 5-7 cloves Garlic (crushed)
    • Salt to taste (1-2 Tbs)
    • Pepper to taste (½ - 1tsp)
    • Lemon Juice (2-3 splashes)
      Dice vegetables, add seasonings and tomato juice. Stir well, and enjoy! It's best the next day once all the flavors have melded together. Just don't over do it on the jalapinos - they don't seem so hot in the just-made batch, but can really pack some heat the next day!

    I think what I was leading up to (four months ago), was Dolly discovery of the salsa. When she saw Butler's doctored salsa, she made her own version of it (where she crushed her corn chips and mixed them into her bowl of salsa and sour cream), and then wrote down her own recipe so she could duplicate it later. I should post her little culinary treasure, but I'm falling asleep just sitting here right now, so perhaps another day. Perhaps.


    Salsa!

    Tuesday, October 26, 2010

    When it's that popular... write it down!

    There are pumpkins everywhere recently. This year we ended up with 7 and three of them went bad before I could do anything with them. When I took a look in the freezer, I discovered that most of what we put away last fall was still there. So, the plan was to figure out a way to start using some of it before quadrupling the stash. Half-heartedly I decided to make soup out of it thinking to myself, "This is not what I would call appetizing."

    With hungry kids whining underfoot and bouncing off of each other in my little kitchen, I proceeded to prepare supper. Finally it was ready and I fully expected to battle most of my children through the meal. But they took me by complete surprise and practically inhaled the stuff. Dolly had 5ths! Butler had two full ladles of soup, PC, full at 2nds, managed to stuff two more servings into himself before reluctantly calling it quits and even Emma, who hasn't been eating much lately, gobbled up 3 servings before slowing down.

    So, when I find something they like, I've learned, it must be recorded someplace for future replicating. I think we'll be making this again, but probably not "Every day" as PC suggested.

    Pumpkin Soup
    Serves 6-8
    • 6 cups chicken stock
    • 4 cups pumpkin puree
    • 1 cup chopped onion
    • 2 cups cooked rice
    • 1½ tsp salt
    • 1 tsp parsley
    • ½ tsp thyme
    • 1-3 cloves garlic, crushed
    • 1 cup cream
    Combine all ingredients except the cream, in a large pot and bring to a boil. Reduce heat and simmer uncovered, for about 30 minutes, stirring occasionally. Puree soup, one cup at a time and return to pot. Bring to a boil, reduce heat and simmer uncovered for another 15-20 minutes. Stir in cream, bring to a boil and remove from heat. Garnish with fresh parsley

    Saturday, March 06, 2010

    Now I need to go shopping...

    I've made this winner twice so far, and had to look up the recipe four times in the process. And there are a number of look-alike recipes out there too, so finding it each time has been quite the adventure - especially when I'm rushing. Hopefully now I'll be able to find it without having to read a dozen recipes until I find the 'right' one.

    Black Bean & Couscous Salad
    Serves 8
    • 1 cup uncooked couscous
    • 1¼ cups chicken broth
    • 3 tablespoons extra virgin olive oil
    • 2 tablespoons fresh lime/lemon juice
    • 1 teaspoon red wine vinegar
    • ½ teaspoon ground cumin
    • 8 green onions, chopped (approximately 1 bunch)
    • 1 red bell pepper, seeded and chopped
    • ¼ cup chopped fresh cilantro (use the whole bunch)
    • 1 cup frozen corn kernels, thawed
    • 2 (15 ounce) cans black beans, drained
    • 1 teaspoon salt and ½ teaspoon pepper (or to taste)
    Directions:
    1. Bring chicken broth to a boil in a 2 quart or larger sauce pan and stir in the couscous. Cover the pot and remove from heat. Let stand for 5 minutes.
    2. In a large bowl, whisk together the olive oil, lime juice, vinegar and cumin. Add green onions, red pepper, cilantro, corn and beans and toss to coat.
    3. Fluff the couscous well, breaking up any chunks. Add to the bowl with the vegetables and mix well. Season with salt and pepper to taste and serve at once or refrigerate until ready to serve.

    Serve with pretty much anything Mexican!

    I love that it's so easy to put together. The most time consuming part is chopping the vegetables so even if you start from scratch you can pull this one off in less than 20 minutes.

    Tuesday, October 28, 2008

    Oven Roasted Tomatoes

    I've made this dish probably four times now, and each time I forget how I did it before and end up winging it again. So, for future reference... this is what I did tonight. It is a great way to complete a meal.

    Oven Roasted Tomatoes
    Serves 4-5
    • Fresh ripe tomatoes.
    • Salt
    • Pepper
    • Parmesan Cheese (grated or shredded)
    • Garlic (crushed, granulated or powdered)
    • Onion Powder - optional -
    Spray a 8x8 or 9x9 inch casserole dish with cooking spray. Wash and cut tomatoes into sixths and place into casserole dish until a single dense layer is formed. The tomatoes will shrink, so don't hesitate to pack them in. Sprinkle with salt, pepper, parmesan, garlic, and onion powder. Put in a 400° oven and bake for 1 hour. Tomatoes should be well cooked down and have very little juice left in the dish.

    The oven temperature can be raised or lowered if you need to use the oven, but the tomatoes seem better when they cook for at least an hour. My oven's top element doesn't work, but I imagine it would give a more 'toasted' flavour and I'd definitely use it on this recipe if I could!

    Friday, September 21, 2007

    Spice!

    They say that you can learn a lot about your baby before it's even born based on how it behaves during the pregnancy. I believe that to be true for the most part. Both Dolly and PC were little acrobats while I carried them, and to this day, they still are. Dolly seemed impulsive - quiet and then suddenly active, whereas PC just kept going... and going... and going - never quite as explosively as his sister, but much more consistently. And they haven't changed.

    Dolly is impulsive and gets excited or disappointed at the drop of a hat, where PC seems to think about everything and appears to plan out every detail which he methodically carries out. For example, say each wanted to get up on my bed. This is how it would work: Dolly would get to our very high bed, decide she wanted to get up, suddenly exclaim, "Oh no!!! I can't get up!" cry about it a little, and then start climbing up the footboard until she succeeded in getting onto our bed. PC would take a look at our high bed, leave the room, come back with a little plastic chair, place it beside the bed and proceed to climb onto the bed via the chair.

    This baby however, has been much quieter during the pregnancy than the other two. It's also very deliberate. Sometimes I wonder if it will be the dreamer of the family. Lost in it's own little world oblivious to the chaos around. Either that, or it's going to be a little recluse and stubborn to boot. The one kid that misses (by various methods) the dinner call and needs a special invitation to join the family at the supper table! I guess we'll see. Eventually. Whenever it decides to grace us with its presence, that is.

    Baby seems very content where it is, not caring whatsoever that it's officially three days past the doctors' estimated due date, and nearly three weeks past mine. Yesterday was my prenatal appointment, and as the doctor had indicated last week, they did try to give the baby a nudge of encouragement. But so far, nothing has happened. This baby could very well wait until next week when they pull out the big guns and actually take a step closer to induction. As I said... we'll see.

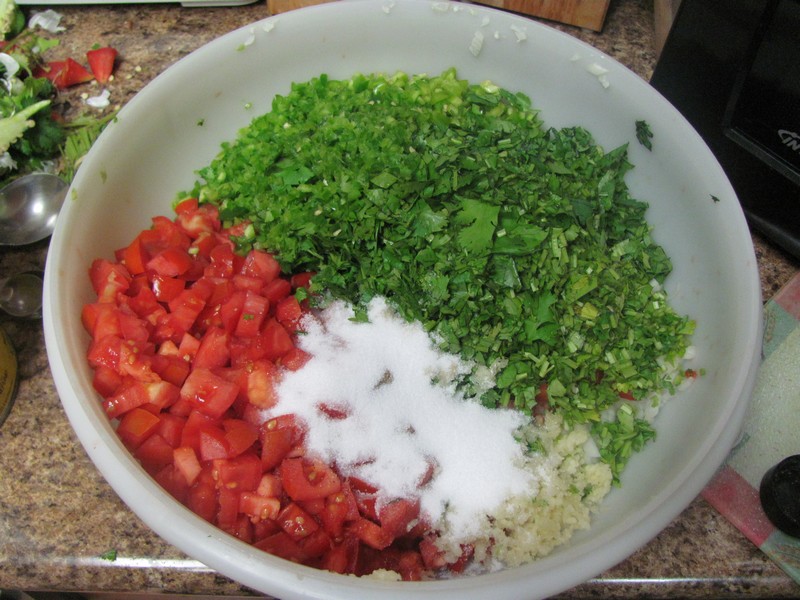
    Anyway, according to myth... or old wives tales... or whatever else you want to call it, labour can be encouraged by spicy foods. I was reminded of this when Sir specially requested that I make him a favorite snack of his a couple nights ago. So, I thought I'd share it here. After all, it has been a while since I posted any recipes! Since I had just finished my supper, I didn't have very much room for this dish that night and given the amount of indigestion I've suffered recently, I didn't try too hard to make any extra room so I only got a bite or two in before I had to call it quits. Of course, nothing happened labour-wise either... not that I was surprised or anything. It just leaves more for Sir, and he deserves a treat once in a while I think.

    Well, I hope those of you who decide to try the recipe, like it. Most of the measurements are estimated because when I make it I just toss a bit of this and a little of that in, until it tastes about right. You can experiment too.

    Firecracker Shrimp Appetizer
    Serves 3-6
    • 1 bag (about 30 pieces) peeled, raw shrimp
    • 15-20 large or about 30 small scallops (optional)
    • 15-20 fresh sliced mushrooms (optional)
    • Up to ½ cup butter as needed
    • 3-4 cloves garlic - crushed
    • 3-4 tsp lemon juice
    • ½-1 tsp hot chili powder
    • ½ tsp salt
    • 1 handful of shredded Parmesan cheese
    Directions:

    - In a saucepan, cook shrimp (and scallops if desired) until done, draining water occasionally.
    - Continue to cook until most of the water evaporates.
    - Add (mushrooms if desired,)approximately 1/4 cup of butter and garlic. Saute shortly (or until mushrooms are done.
    - Add chili powder (use half and sample - it gets spicier as it cooks), lemon juice and salt (to taste).
    - Stir and saute for a short while longer, adding more butter, lemon juice and/or chili powder as needed.
    - Remove from heat, garnish with Parmesan cheese and serve with warm crusty bread.
    Enjoy!

    Thursday, February 22, 2007

    Chili and Cornbread

    I wanted to make chili for supper today since I figured that it would be a quick meal to eat. When we're rushing to get to meeting on time, a quick meal is a good idea. I guess I should point out that although it won't take long to eat this meal it will take some time to create. Unless you're going to take shortcuts like using canned beans, plan to leave yourself about four hours from start to finish.

    The chili recipe is my own creation since I couldn't find any online that I liked. Instead I read a bunch of chili recipes and gathered ideas to throw into this one. As for the cornbread recipe, I only made one small change to the recipe that I found online so I won't claim it, but instead will just pass it on to you since it turned out so well!

    Chili
    Serves 6
    • 2 cups dried pinto beans
    • 2 lbs regular ground beef
    • 1 large onion
    • 2 stalks celery
    • 5 cloves garlic
    • 4 Tbs beef bouillon
    • 2 tsp salt
    • 2 cans stewed tomatoes
    • 1 can tomato soup
    • 1½ tsp cumin
    • 2 tsp paprika
    • 3 tsp chili powder
    • 1 tsp red pepper flakes
    • 2 tsp oregano
    • ½ tsp pepper
    • 1 tsp Worcestershire sauce
    Directions:
    Rinse pinto beans and place in a large pot. Cover with water and bring to a boil. Reduce heat and simmer until beans are tender. Stir occasionally and replace water as necessary. Keep beans covered with water. When beans are tender, add bouillon, 1 tsp salt, stir and continue to simmer. Brown beef. Leaving grease in pan, add beef to beans. Saute onion, garlic and celery in the pan from the beef. Drain if necessary and add to beans. Continue to simmer. Add stewed tomatoes(with juice), tomato soup, 1 soup can of water, and spices. Stir, bring to a boil and simmer for about an hour (more or less won't hurt anything) stirring occasionally. Serve topped with shredded cheese and hot cornbread.

    Cornbread
    Serves 6
    • 1 cup flour
    • 1 cup yellow cornmeal
    • ⅓ cup sugar
    • 4 tsp baking powder
    • ¾ tsp salt
    • 2 eggs
    • 1 cup milk or buttermilk
    • ¼ cup cooking oil
    Directions:

    Sift together flour, cornmeal, sugar, baking powder and salt. Add eggs, milk and oil. Beat until just smooth - do not over beat. Turn into a greased 9x9x2 inch baking dish. Bake at 425° for 20-25 minutes. Can add drained corn, bacon, finely chopped jalapeno peppers etc. Serve hot with butter and honey.

    Tuesday, November 14, 2006

    Cioppino - Soup of the Sea!

    If you want an easy-to-make meal that would feed an army - This would be it. I even forgot to add the water and wine an equivalent of 2½ cups of liquid, yet we still had enough food to feed five adults and three children for supper, have a leftover lunch and to freeze five servings for Sir to take to work in his lunches! And it was so easy! All of the seafood was either frozen or canned, so that left me tons of time to make a green salad, slice French bread, set the table and make Baklavas for desert!

    Cioppino
    Serves 12-14
    • ¾ cup butter
    • 2-3 onions, chopped
    • 3 cloves garlic, pressed
    • 1 bunch fresh parsley, chopped
    Over medium-low heat melt butter in a LARGE stockpot, add onions, garlic and parsley. Cook slowly, stirring occasionally until onions are soft.
    • 2 (14.5 ounce) cans stewed tomatoes
    • 2 (14.5 ounce) cans chicken broth (or 4 cups)
    • 2 bay leaves
    • 1 tablespoon dried basil
    • ½ teaspoon dried thyme
    • ½ teaspoon dried oregano
    • 1 cup water
    • 1½ cups white wine
    Add tomatoes to the pot (break them into chunks as you add them). Add chicken broth, bay leaves, basil, thyme, oregano, water and wine. Mix well. Cover and simmer 30 minutes.
    • 1½ pounds large shrimp - peeled and deveined
    • 1½ pounds bay scallops
    • 18 small clams (or 1 small can)
    • 1½ cups crabmeat (or 2 small cans)
    • 1½ pounds cod fillets, cubed
    Stir in the shrimp, scallops, clams, crabmeat and fish. Bring to boil. Lower heat, cover and simmer 10 minutes. Enjoy!

    Monday, September 11, 2006

    Salmon Recipe

    A couple of weeks ago, there were some requests for a Salmon recipe that Sir found online and we served to guests at one point in time. I decided that I would post that recipe since there might be others who didn't see my responding comment. This version includes the changes that we've made as well. It is best served with rice.

    Poached Salmon with
    Mixed Seafood Cheese Sauce

    Serves 6-8
    • 3-4 lbs Salmon fillets
    • 1½ c Chicken broth
    • 2 stalks Celery
    • ½ Onion
    Cut celery and onion into large pieces (3+inches). In a large skillet, simmer chicken broth, celery pieces and onion slices. Simmer for about 15 minutes. Lay the fillets (skin up to avoid dryness) over the vegetables, tucking the tail end under and continue to simmer until done through, about 30 minutes. Make sure it is flaky and done all of the way through by separating the fish with a fork. If it is still bright orange, simmer longer. Meanwhile, make the sauce.

    The Sauce:
    • 4 Tbs Butter
    • 4 Tbs Flour
    • ½ tsp Salt
    • 2 c Milk (preferably whole)
    • 8 oz Monterey Jack Cheese
    • ½-1 lb Miscellaneous Seafood (shrimp, scallops, crab etc.)
    In a large saucepan, melt the butter. Add the flour, stirring constantly. Cook for about 1 minute, then gradually add the milk. Heat through but do not boil. Once hot, gradually add the cheese and stir until it is all melted. Add the mixed seafood, heating gently until the sauce is hot and the seafood is fully cooked.

    Remove the fish from the skillet. Drain and cut the vegetables into smaller pieces and add them to the sauce. Serve the fish and sauce separately as some like more sauce than others. Enjoy!

    Monday, August 28, 2006

    Curry!

    This curry recipe is a modified, combined and doubled version of a cook book recipe and an internet recipe. I omitted things I didn't like the sound of, and kept what looked good. It actually turned out pretty good so I thought I'd record the changes I made and share it.

    Csanyi Chicken Curry
    Serves 12-14
    • 4 lbs chicken - boned, and cubed.
    • 6 Tbs flour
    • 4 tsp salt
    • 4 pinches chili flakes
    • 1 tsp pepper
    • 4 Tbs vegetable oil
    Toss chicken pieces in flour, salt, pepper and chili flakes. Heat oil in large skillet. Brown chicken well. Set aside.
    • 3 onions - chopped
    • 4 cloves garlic - crushed
    • 2 tart apples - chopped
    • 2 red or yellow peppers - diced
    Sautée and set aside.
    • ½ c flour
    • 1 c butter
    • 8 tsp curry powder
    • 2 Tbs sugar
    • 1 tsp ginger
    • ½ tsp dry mustard
    • ½ tsp pepper
    • 2 medium tomatoes - chopped
    • 6 c chicken broth
    • ½ c shredded coconut
    Cook and stir butter, curry powder, flour, sugar, ginger, mustard, pepper and tomatoes. Cook, stirring occasionally, 5 min. Add Sautéed vegetables. Stir in coconut and chicken broth. Heat to boiling; reduce heat. Cover and simmer1 hour stirring occasionally.
    • 1 c raisins
    Add raisins and chicken to sauce. Cover and simmer, stirring occasionally about 25 minutes.